Tutorials/Global Illumination
From PixieWiki
Contents |
[edit] A Basic Overview on Global Illumination
This page describes a little about how to get the best from Pixie's Global Illumination support.
First off, it's probably worth explaining a bit about how Pixie calculates Global Illumination.
Global Illumination (people like to call it "GI") is actually a pretty broad term, which refers to 'global' solutions to lighting. Rather than the direct, local interaction between a light and the surface, light interaction with all objects and surfaces, is taken into account.
For full colour bleeding, lighting interaction with surfaces is taken into account even if light from a lamp doesn't directly reach the surface.
For ambient occlusion, blocking of light by nearby surfaces is accounted for - even when the lightsource is not in a single defined position.
Quick example: You put your lamp in a box, and the box has a ball in it. Without GI, the ball casts a pitch-black shadow, because light doesn't reach there (the the ball is blocking it). But, with GI, light might reach underneath the ball, because the light that reaches the walls of the box, from the lamp, bounces off and into the shadow.
Global illumination support consists of the following techniques
"photon mapping"
Photon maps allow you to account for multiple bounces of light (and the interaction with each surface the light hits), and allow colour to diffusely 'bleed' from one surface to another. They are prepared with the 'photon' hider.
"Irradiance Cacheing"
Irradiance caches are an acelleration structure which allow diffuse colour bleeding or ambient occlusion to be calculated, without having to compute the expensive calculation at every shading point. Ambien
Eventually, I'll add proper examples for all of the cases. For now, you can look at Per Christensen's paper "Global Illumination and All That" [1]. Link is at the bottom.
[edit] Photons
Firstly, if you want colour bleeding between diffuse surfaces, you'll need a photon map. If you don't want colour bleeding, you don't need a photon map pass. Photon maps record the irradiance on a surface as light bounces from surface to surface. Photon maps are baked using the photon hider (use this snippet):
Hider "photon" "emit" 300000
...
Attribute "photon" "globalmap" "photonmap.gpm"
Attribute "photon" "estimator" 100
The more photons that are emitted, the bigger, but more accurate the photon cache will be.
Each object can have a photon map attached via an attribute which controls where the photons are stored. The estimator parameter defines how many photons are used to estimate irradiance.
Bigger estimator values are smoother, but less accurate. Smaller values may be noisy.
Emit as many photons as you can, and use as small a photon estimator as makes sense for your scene.
Photons are emitted by lights - so if there's no lights, you'll get no photons.
You can use the show program to view the contents of a photon map on disk, to check the density of photons.
Having gotten a photon map from your first pass, you can now calculate the indirect lighting. This works by sampling a hemisphere at various points in your scene to evalute the incoming light. These sampled hemispheres are costly to evaluate. Therefore, a cache (the irradiancecache) is used to speed up the evaluation. This interpolates between samples from nearby places to work out the lighting in between sample points.
[edit] Irradiance Caches (RIB)
The cache to use is specified using an attribute:
Attribute "irradiance" "handle" "irr.icf"
The mode with which to operate on the cache is specified using an attribute also:
Attribute "irradiance" "filemode" "w"
The valid modes for Pixie are:
- ""
- One-shot cache created on the fly (default)
- "r"
- Read from the cache specified, add samples to it on the fly (but don't save them back out)
- "R"
- Read from the cache specified, use only samples already in the cache
- "w"
- Add samples to the cache then write it out
- "rw"
- Read a cache, add samples to it, then write it back out
But... Simply adding these attributes to your scene will not have any effect. You need to have a shader attached which uses either the occlusion or indirectdiffuse shadeops. Both of these can store / retrieve results from an irradiancecache (see below for the differences in what's stored).
To get color bleeding, you'll need to specify a photonmap which is used to esitmate the irradiance when writing the irradiancecache.
Attribute "photon" "globalmap" "cornell.gpm"
Attribute "photon" "estimator" [500]
Both irradiance caches and photonmaps are specified by attributes - you can use different one or different settings for each primitive if you want.
[edit] Irradiance Caches (SL)
When baking out irradiance, your shader should have a call to indirectdiffuse
...
normal Nn = normalize(N);
color indirect = indirectdiffuse(P, Nn, samples);
...
Where samples is the number of samples to use when estimating the lighting hemisphere. Note that the indirectdiffuse shadeop only has to resort to sampling the hemisphere when the data in the cache cannot provide a sufficiently error-free interpolated answer. In which case it samples the irradiance hemisphere and inserts the sample into the cache. Sampling is done by raytracing - so make sure ray tracing is turned on.
Use as many samples for indirectdiffuse as as possible (512, 1024 are good values).
Make sure ray-tracing is enabled for your primatives - it's needed to add samples to the cache
The indirectdiffuse shadeop takes some optional arguments. I'll explain these a bit later, in the tweaks section.
The resulting color 'indirect' can then be used along with direct lighting contributions to shade the surface color. The other effect of this shadeop running, is that the cache will be filled up. Depending on the values for maxError (and some of the other parameters), many samples will end up in the cache, or only a few. Either way, some samples may be interpolated from those already in the cache, and maxError controls 'how often' this happens.
Of course you can use these results straight away (you don't even have to explictly save out or name a cache). But it's often more powerful and more flexible to use this first step to save out a cache, then to reuse it later.
[edit] Multi-Pass approaches
Broadly speaking, multi-pass approaches consist of saving out a cache using the 'w' mode above. The cache is then read back using either 'r','rw' or 'R' modes. Once again, the indirectdiffuse shadeop will interact with the cache. The idea is that the cache has been properly constructed in the first pass, so reading it back is fast, and results will be estimated from samples in the cache.
If the mode is 'r' or 'rw' then additional samples may be added to the cache where needed, this is exactly like the cache construction in the previous pass.
For the r or rw modes in a multi-pass approach, remember to add the globalmap and photon estimator attributes so that illumination can be estimated for the new samples
So why use a multi-pass approach? There are a number of reasons. First, the cache is saved out an estimating irradiance using values in the cache is fast. This means you can bake once and reuse the bake for many viewpoints. You can also control the interpolation of the prestored results to blur the results stored in the cache.
If you intend to use a cache from a number of viewpoints, there's some things to bear in mind. Essentially, it is the execution of the indirectdiffuse shadeop that causes samples to appear in the cache - during the cache-bake pass. Pieces of geometry which do not get shaded dont insert samples.
So when reusing the cache in a second pass, if these surfaces become exposed, there are no stored values in the cache.
Make sure all the scene you want baked is in view for the bake pass
For cache reuse, setting several attributes can help the cache to be sufficiently densely populated
Attribute "dice" "rasterorient" 0 # view independent dicing
Attribute "cull" "backfacing" 0   # don't cull backfaces before shading
Attribute "cull" "hidden" 0         # shade hidden faces too
Turning off raster oriented dicing means that a non screen-space metric is used when dicing. This ensures geometry far from the screen still gets diced finely. Otherwise, it may be coarsly diced and the samples inserted into the cache might be far appart.
Turning off backface culling allows 1-sided grids which are pointing away from the camera in the bake scene to be shaded. Their sidedness will still be used to determine final visibility.
Turning off hidden surface culling allows hidden surfaces to be shaded. They'll still be hidden in the final image, but the shader will execute, saving irradiance points so that from a different viewpoint, the cache still has data.
Don't use these for normal renders, they'll all cause more grids to be shaded and more shading points to be created. This will slow things down. However, they are a good idea for any sort of baking, irradiancecache included.
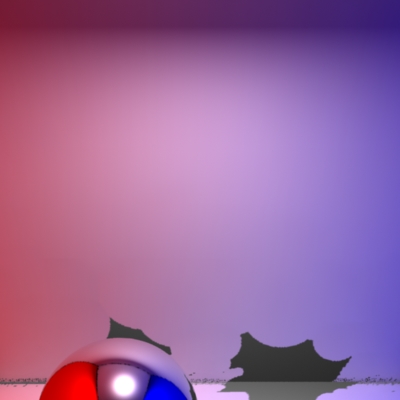
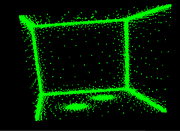
Notice the area behind the sphere which isn't covered by samples in this example. This is fixed by turning off culling of hidden surfaces. There are also issues due to the fact that non-raster-oriented dicing was off when the cache used in this image was baked.
When reading back data in the second pass, you may find it useful to set maxError slightly higher than in the bake.
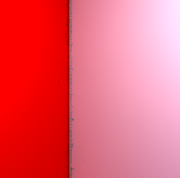
This ensures that the slightly more blurred lookup has data from the cache. Otherwise, you may find that right in the corners where the irradiance changes quickly, that the samples are too small and some specled holes appear in the irradiance data. This mainly applies to reusing cache data from different viewpoint.
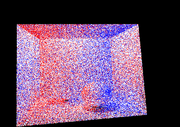
The bake pass:
Using the cache with a different viewpoint (see the errors where insufficient data is available in the cache):
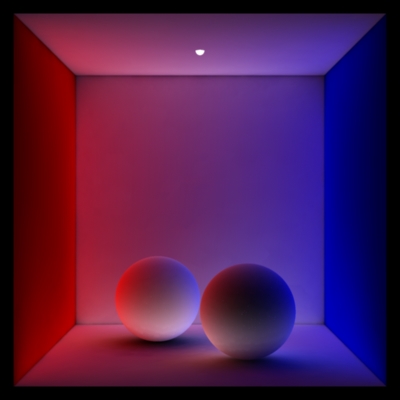
Fixed image (either rebake the cache with higher shading rate, or use a slightly higher maxError when reading the cache)
[edit] Controlling the cache Density
The main parameter you have for cache quality / density is maxError. It is 0.5 by default. Higher values when baking result in quicker renders, smaller (less dense) caches. Lower values result in more dense caches. A value of 0 means never interpolate.
Higher values of maxError give more error but are faster. Lower values are more accurate, and take longer
So basically, you bake with the smallest tollerable maxError, perhaps 0.1. However, because the cache is filled using the shading execution points, you need to ensure these are sufficiently dense if the cache is to be reused from other viewpoints. Generally using a higher shading rate (numerically smaller number to ShadingRate) will achieve more shading points and result in a denser cache. Also a bigger resolution in the bake scene may achieve a similar result. Note that shading rate is specified in terms of the area of final pixels - more pixelSamples won't do the job.
To get a denser cache increase the resolution or use a higher shading rate
A larger maxError when reading a cache that already has values allows a larger number of samples to be used to estimate the irradiance. In other words, it blurs the results in the cache slightly. In combination with the above technique for producing a relatively dense cache in the first place, this can be used to smooth out areas where the samples are too sparse after moving the view.
The show program can be used to view a cache and to see it's sample density.
[edit] Global Illumination parameters
maxError
As discussed, maxError controls two things. Firstly when it's OK to use samples already in the cache (and hence the blurriness of using such samples. Secondly it controls when to add samples to the cache (because none are available in the cache). It's an attribute set in the RIB.
minR and maxR
The parameters "minR" and "maxR" are optional parameters passed to the indirectdiffuse shadeop. They control only newly added samples and therefore are useful for baking. They represent the minimum and maximum radius that a sample can occupy.
Normally you would not alter these parameters, but doing so may helpprevent interpolation artifacts or otherwise help control the number of samples.
The maxR parameter puts an upper limit on the radius of validity for a sample. The minR parameter on the other hand can prevent the radius of validity becoming too small.
Setting a small maxR paramter will probably increase your cache size (but will make it contain more accurate data). Increasing minR sets an upper bound on the size the cache can grow to. Note you must set minR and maxR such that minR < maxR.
maxdist
The "maxdist" parameter to indirectdiffuse controls the maximum intersection distance for rays when sampling the irradiance hemisphere. You may wish to limit the influence of far off objects by setting this. By default it's infinity.
trace bias
Trace Bias ( Attribute "trace" "float bias" [0.01] ) isn't a GI attribute per-se but because irradiancecaches use raytracing to sample the irradiance hemisphere, you need to make sure the bias is appropriate for your scene.
[edit] Radiance Caches
TODO
[edit] Occlusion
TODO
See also
