Tutorials/BakeToTexture
From PixieWiki
The new 3D Baking support in Pixie can be leveraged to produce traditional textures - you can bake the results of a Pixie render back into a texture.
In order to do this, your object must have a valid s,t mapping (ie a UV mapping from your modelling package). This is especially important for polygon and subdivision surface meshes.
Baking works in the following way:
- The surface shader for each object you wish to bake is augmented with a bake3d() call to save out the result of shading.
- This produces a point cloud
- This point cloud is used in a second render to produce the texture
- You can optionally prepare a brickmap / 3d texture from the point cloud to speed the texture production, and allow more agressive blurring.
[edit] Augmenting your shader to bake
In this example, the standard mirror shader is modified to support baking. The concept however can be applied to any shader. Basically there are two modifications:
- Add a parameter to specify the name of the pointcloud to bake the result to
- Add the bake3d() shadeop to the shader.
Original shader:
surface mirror(float Ka=1,Ks=1,Kr=1,roughness=.1,samples=1,blur=0; string texname="raytrace") {
    normal Nf;

    N = normalize(N);
    I = normalize(I);

    Nf = faceforward(N,I);

	// raytrace will convert to worldspace, but non-raytrace
	// environments should be looked up in world space
	vector R = reflect(I,Nf);
	if( texname != "raytrace" ) R = ntransform("world",R);

    Oi = Os;
    Ci = Os * (Cs * ( Ka*ambient() + Ks*specular(Nf,-I,roughness) ) +
              Kr*environment(texname,R,"samples",samples,"blur",blur));
}
Modified shader:
surface mirror_bake(float Ka=1,Ks=1,Kr=1,roughness=.1,samples=1,blur=0; string texname="raytrace";
   string pointcloudname = "";
 ) {
    normal Nf;

    N = normalize(N);
    I = normalize(I);

    Nf = faceforward(N,I);

	// raytrace will convert to worldspace, but non-raytrace
	// environments should be looked up in world space
	vector R = reflect(I,Nf);
	if( texname != "raytrace" ) R = ntransform("world",R);

    Oi = Os;
    Ci = Os * (Cs * ( Ka*ambient() + Ks*specular(Nf,-I,roughness) ) +
              Kr*environment(texname,R,"samples",samples,"blur",blur));

    point Pbake = point(s,t,0);
    bake3d(pointcloudname, "BakeCol", Pbake, normal(0), "coordsystem", "current",  "BakeCol", Ci);
}
Here, we are preparing the point to bake as point(s,t,0). This is important, as it means that we store the shading points in a space which matches your UV mapping. Normally, you would simply use P here, but we want to be able to unwrap the mapping.
The data is baked with no normal (as volume data) - which we specify with the normal(0) parameter to bake3d(). We do this to avoid some of the points facing away from the surface which we later use to reconstruct the texture.
Finally, and very importantly, the bake is done into the "current" coordinate system, as specified by adding ..."coordsystem", "current"... before the data parameters to bake3d. Normally we would bake into the default world coordinate system (or perhaps the object coordinate system), but this would require that the system matches when we read back the point cloud. For the technique shown here, the coordinate systems will not match, so we must bake the data with no transform at all - as specified by the "current" coordinate system.
[edit] Preparing your baking RIB
For baking to work your rib must include a definition of the channel used for baking (BakeCol in this example). The following line is added before WorldBegin:
DisplayChannel "varying color BakeCol"
The objects you wish to bake must have a number of attributes set, and and the augmented shader assigned
Surface "mirror_bake" "pointcloudname" "myobject.ptc"

Attribute "dice" "rasterorient" 0
Attribute "cull" "backfacing" 0
Attribute "cull" "hidden" 0
Attribute "dice" "binary" 1
ShadingRate 0.5
The attributes we set have important roles for baking:
- Attribute "dice" "rasterorient" 0 means that dicing of the grids is done in a view-independant manner, meaning that the grid size is more even for your baked object
- Attribute "cull" "backfacing" 0 means that we draw the reverse faces of objects with respect to the camera - otherwise they are not shaded, and we do not get baked data for them
- Attribute "cull" "hidden" 0 tells Pixie not to cull hidden (occluded) parts of your object, allowing them to be shaded, and the data baked
The shading rate is increased from the default to illustrate that you can increase the accuracy of the baking (by increasing the density of the point cloud) without moving the camera.
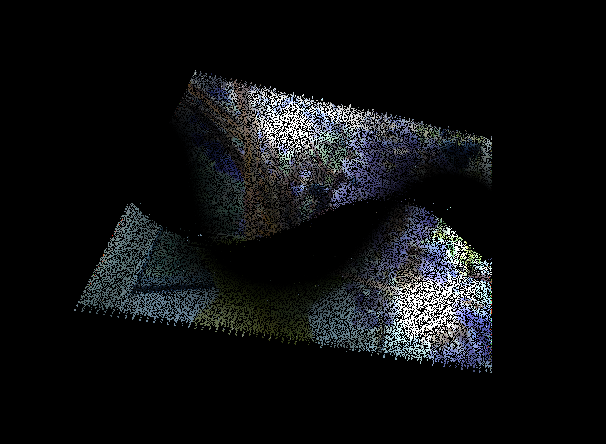
When this render completes, "myobject.ptc" is saved out. It will contain a 'flat' pointcloud. Here is such a point cloud for another render:
[edit] Creating a Texture
The trick to creating a texture from this is to use Pixie to render a flat polygon over the whole of the view. The polygon will have a special shader attached to read the point cloud back.
Here is an outline rib:
FrameBegin 1

DisplayChannel "varying color Col1"
Display "2DBake.tif" "file" "rgb"
Display "+2DBake.tif" "framebuffer" "rgba"

Format 1024 1024 1					# Set the size of the produced texture

PixelSamples 2 2						# Set the image filtering
PixelFilter "gaussian" 2 2
ShadingInterpolation "smooth"

Projection "orthographic"
	WorldBegin
	Sides 2
	AttributeBegin
	Color [ 1 1 1 ]
	Surface "read2dbm"			# The  read-back shader
	   "pointcloudname" "myobject.ptc"	# change this to the object's baked pointcloud
	   "bluramt" 0.3				# allows blurring to be controlled

	Translate 0 0 0.02
	Polygon "P" [ -1 -1 0   1 -1 0   1 1 0  -1 1 0 ]
		"st" [ 0 0  1 0  1 1  0 1  ]
    AttributeEnd
  WorldEnd
FrameEnd
The read3dbm shader is very simple. It looks like this:
 surface read2dbm(string pointcloudname = "ii.ptc"; float bluramt = 0)
   {
       point Pbake = point(s,t,0);
       texture3d(pointcloudname, Pbake, normal(0),"coordsystem", "current", "radiusscale",1+bluramt, "BakeCol", Ci);

        Oi = Os;
    }
Here, we simply read back the pointcloud - or brickmap if you had converted it to one (which you would want to to if large blurs were needed). The result is used to directly color the polygon (no lighting is used).
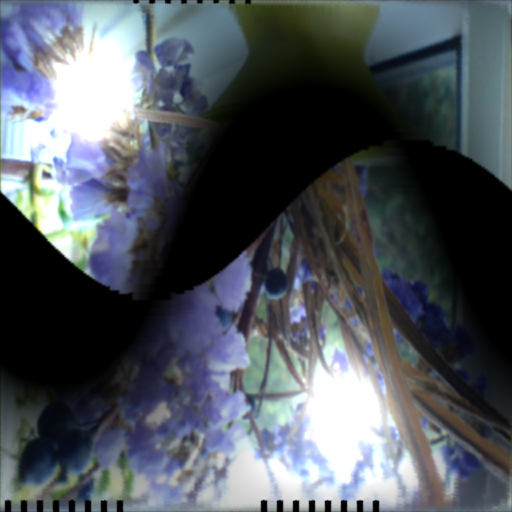
Here is a baked texture which is from a modified paintedplastic shader (so it includes lighting).
Note that there are some illustrative artifacts in this example. The texture was baked from a nurbs sphere, which means it has extreme pinching at the poles. These gaps can be removed by increasing the shading rate (making it a smaller number). The come from places in the st space that Pixie did not need to shade. There are also some artifacts where the normal flips due to the use of faceforward in the shader. These are things to bear in mind when writing a shader for baking.
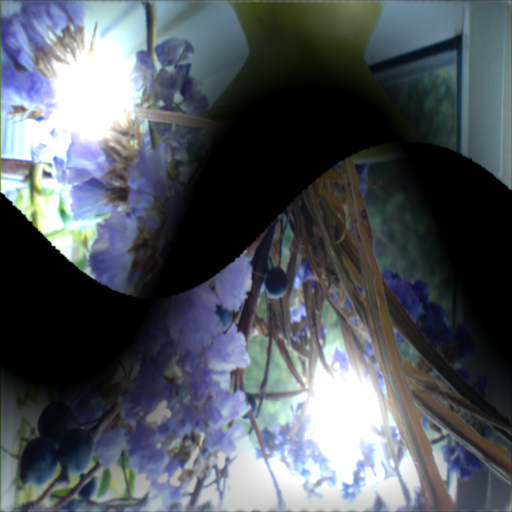
A slightly higher shading rate and fractionally more blur gives better results:


